How To Troubleshoot Integration Control Issues
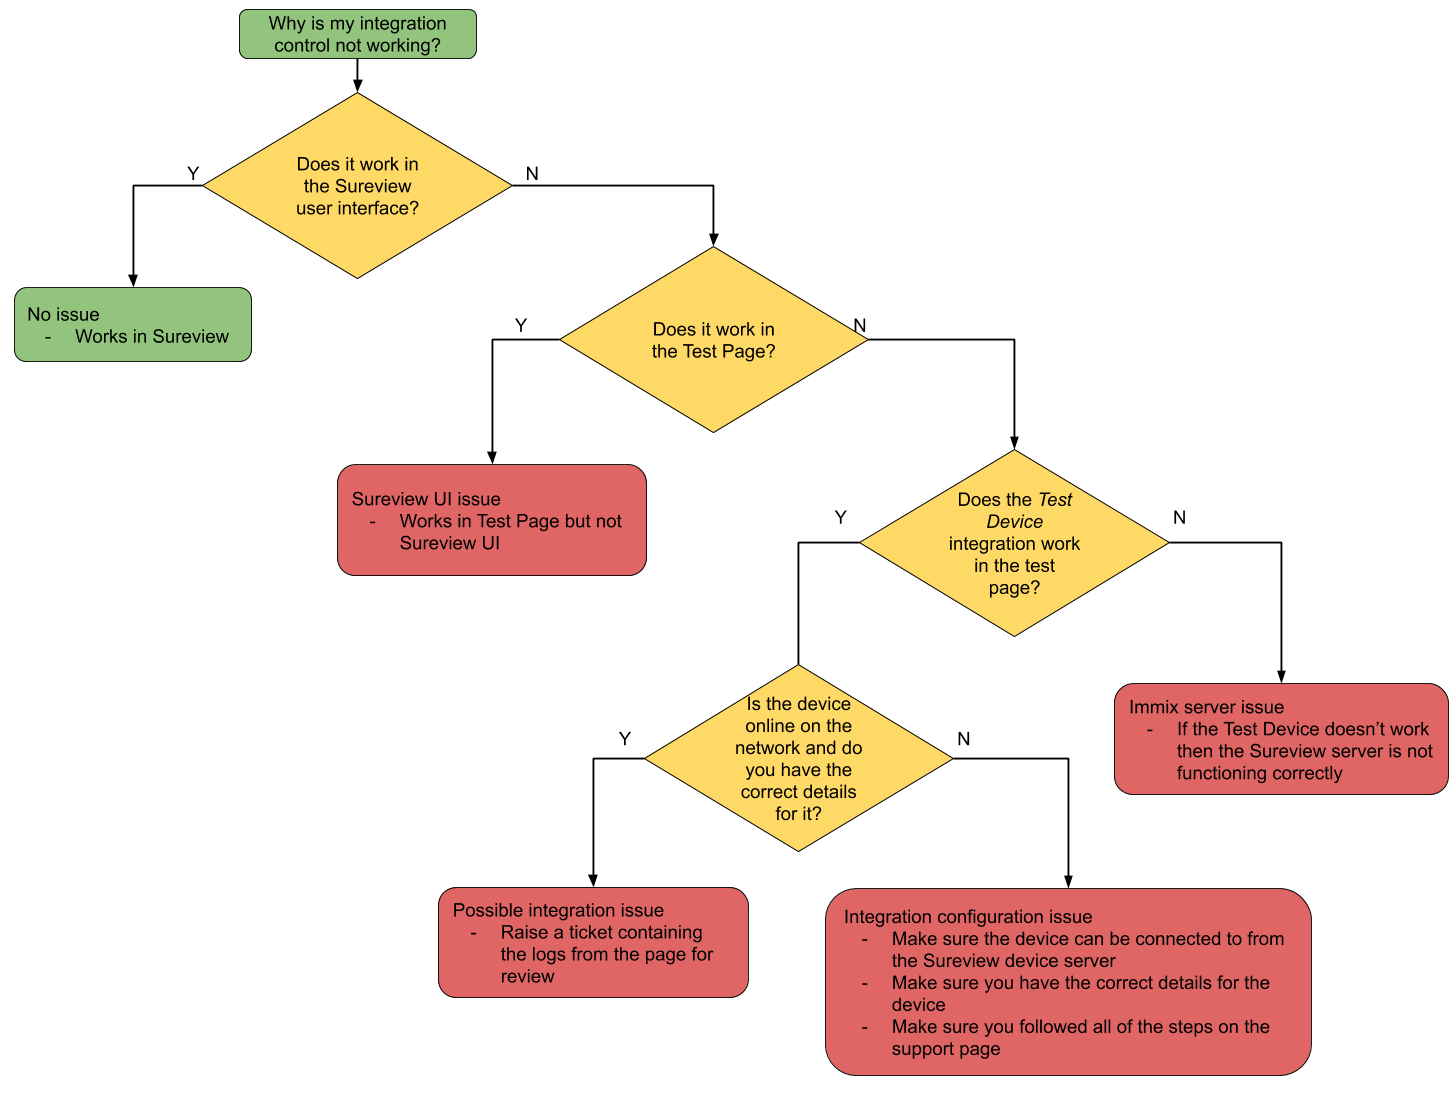
There are a number of things that could cause control features of integrations (such as Video, Output control, Sync etc) not to work:
- Issue with the integrated device's configuration (i.e. the "External Configuration" section of the integration's support page hasn't been followed)
- Issue with Surview's configuration (i.e. the "Sureview Configuration" section of the integration's support page hasn't been followed)
- Sureview cannot connect to the device or system (see Network Troubleshooting)
- An Sureview server configuration issue (i.e. Sureview is not working properly, perhaps due to a bad setting)
- An issue in to the Sureview user interface (i.e. there is a bug in the Sureview UI)
- A problem with the integration itself (i.e. there is a bug in the Integration)
The Device Server component provides two features to assist with working out where the problem is out of the possibilities above:
- The Test Client which allows interaction with all features of integrations, allowing you to test integrations outside of the Sureview user interface.
- The Test Device which is an integration plugin that simulates all integration features (generates video and audio etc), allowing you to test integration features in a controlled environment outside of a real integration which may be affected by external factors.
Test Client
1) Open the page
To use the test page, go onto an Sureview Device server and open Chrome to http://localhost/devices/client.html
NOTE: as per the Network Troubleshooting guide, you must always start locally on the server and only when that works move outside of the server.
Tip: all the boxes and buttons on the test page have tooltips that will show if you hover your mouse over them that explain what they do.
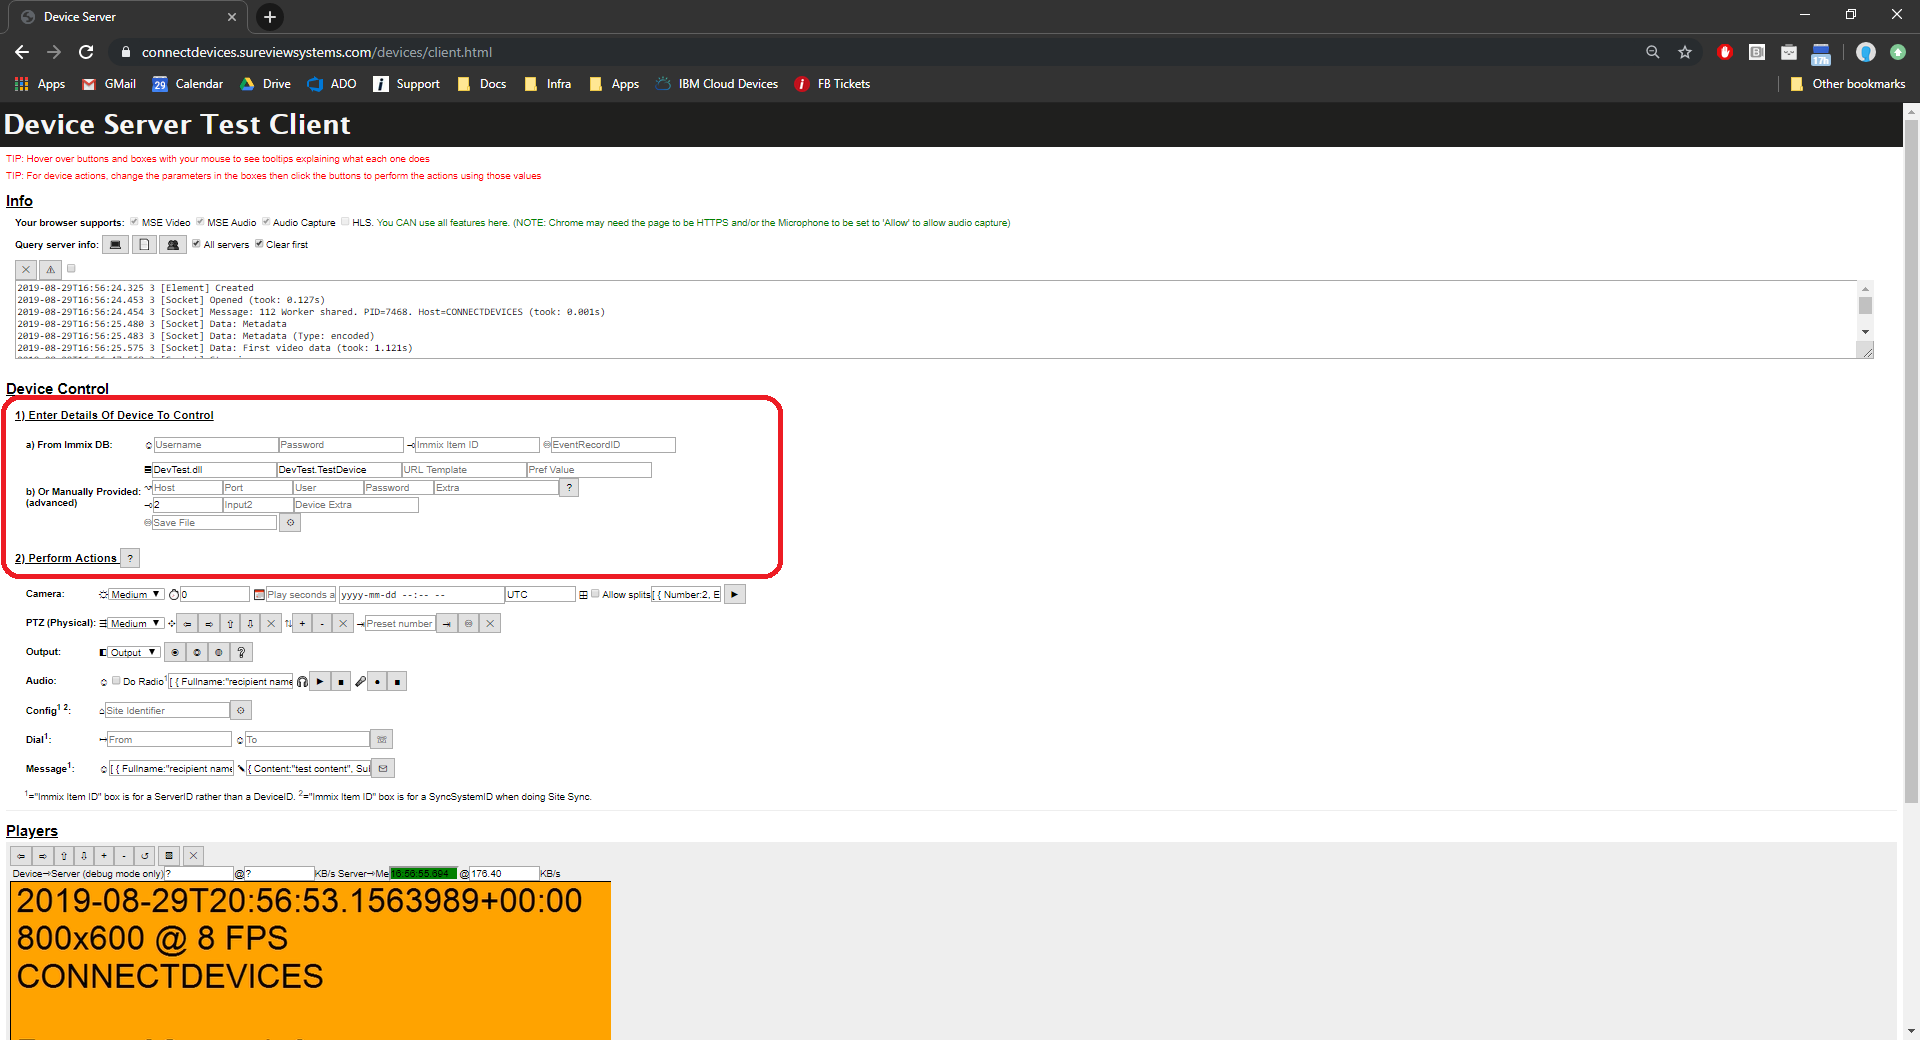
2) Enter device details
In the "Enter Details Of Device To Control" section you can either:
- Use a device in Sureview: Test a device that exists in Sureview by providing the username and password of an Sureview user along with the Device ID of a device in Sureview. To get the Device ID you can either:
- For a camera: use the camera preview popout of the Sureview Setup user interface and look in information below the camera stream.
DeviceId=#

- For any other device: find the device in the "Devices" table of the Sureview database.
- For a camera: use the camera preview popout of the Sureview Setup user interface and look in information below the camera stream.
- Manually enter details (advanced): manually provide all the details of the integration including the Device DLL file, the Type within that, and all the connection information (Host, Port, User, Password) that would normally be entered in the Sureview Setup user interface. This should only be used in advanced cases if the device is not already added to Sureview.

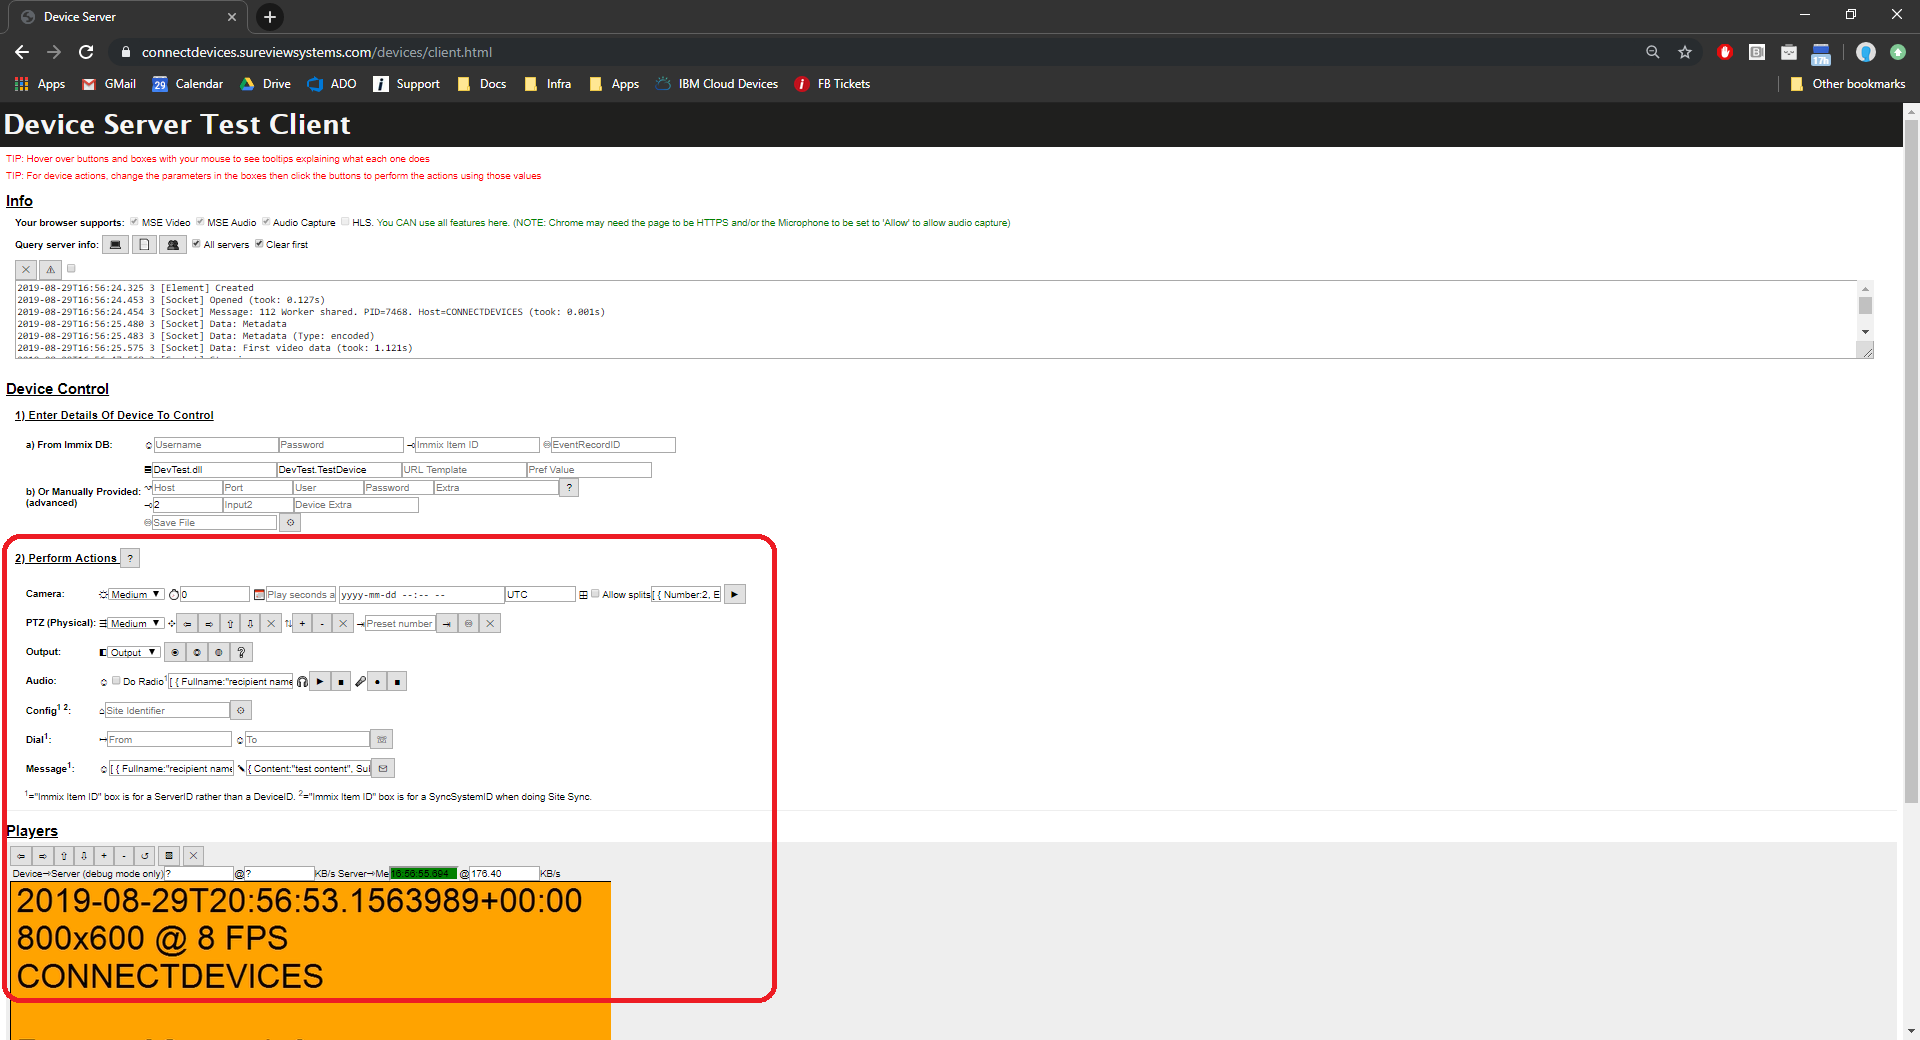
3) Interact with the integration features
Click the buttons under the "Perform Actions" section to use the features of the integration, noting that any action you take does have an effect on the system:
- Camera video (live and playback), Audio Receive, and Config/Sync will likely have minimal impact (you are pulling data from the integrated device or system though)
- The other actions may have more of an impact so get permission first before you test:
- PTZ: you might be moving the camera while someone is trying to watch an intruder on it
- Outputs: you might be opening doors or barriers causing security/safety risks
- Audio Transmit, Dialing, and Messages: you might be broadcasting over a PA system, making phone calls, or sending emails and texts causing annoyance for people on the other end

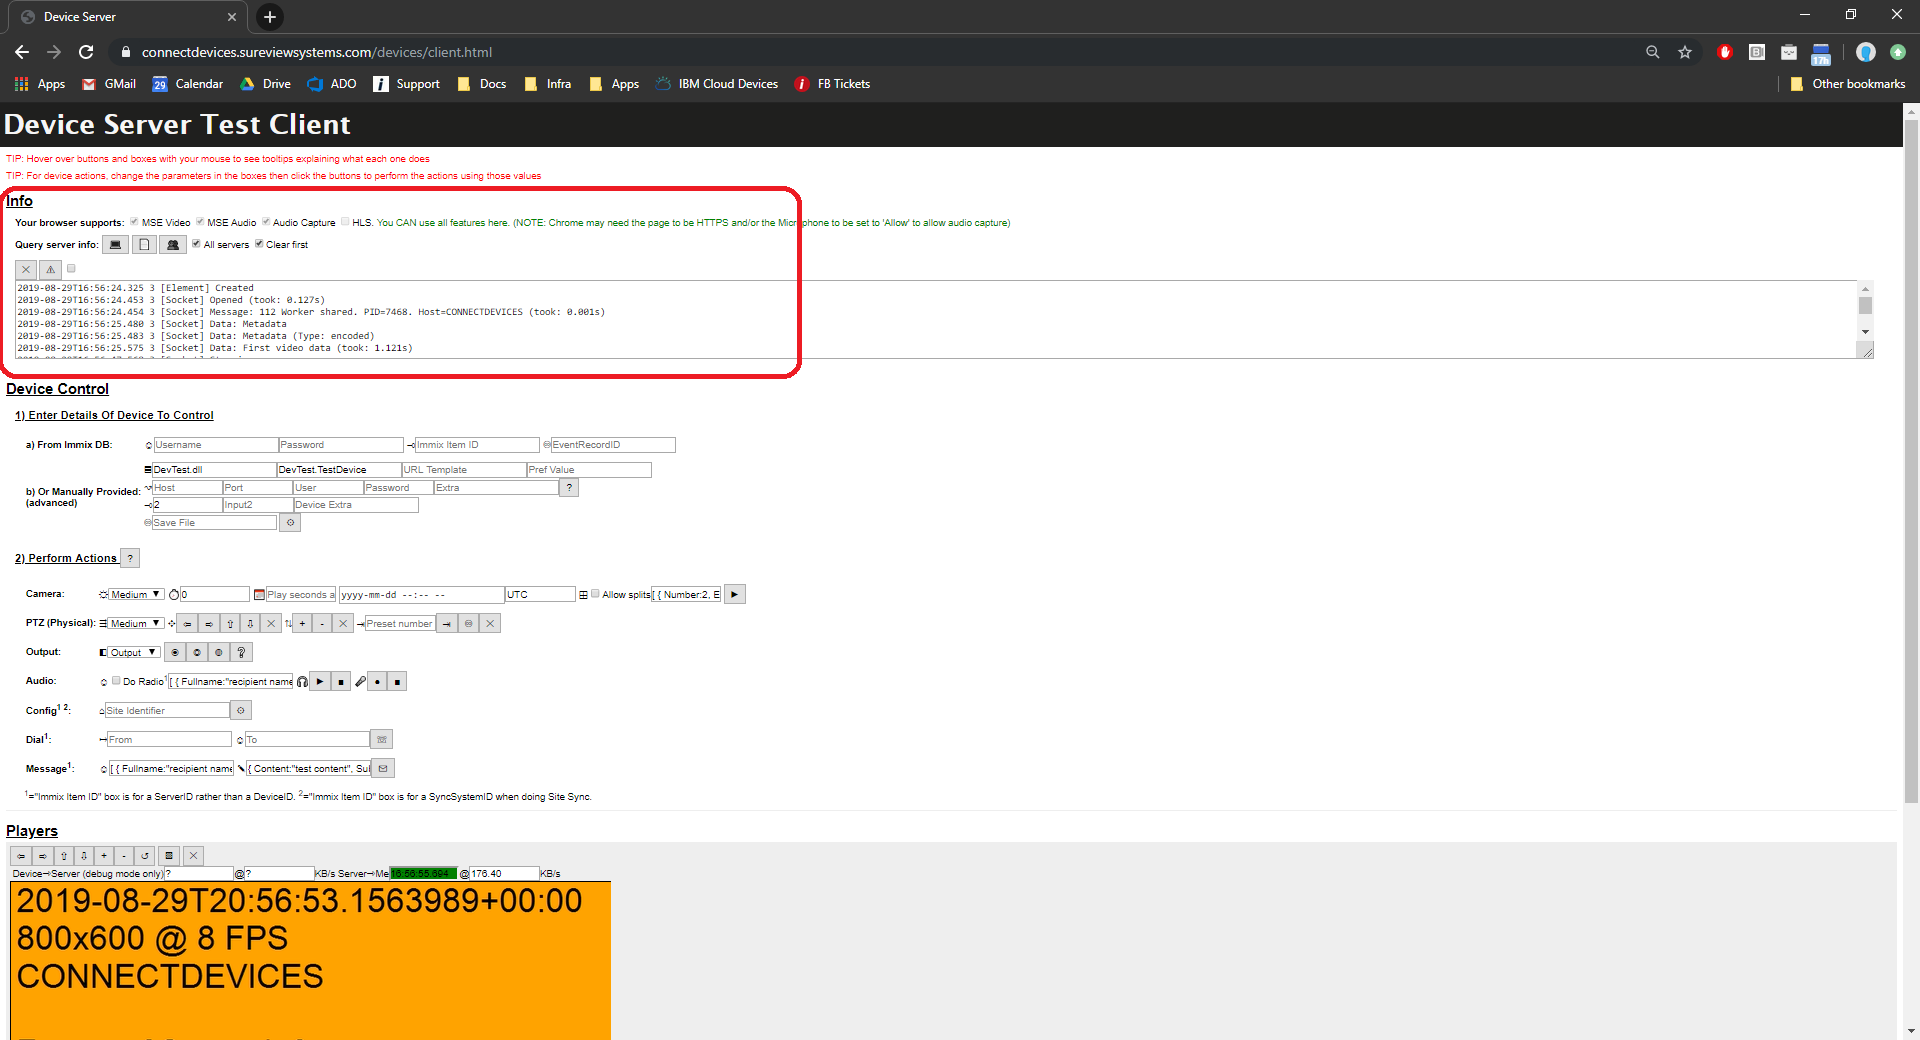
Log Output (for tickets) and Server Info
The box at the top will output logging information allowing you to see what is happening and how long things are taking. Any errors will be shown including the command inside the integration that failed if it was an integration failure.
The information in this box will need to be provided in the ticket when escalating integration issues.
There is also a "debug" mode that can be enabled by ticking the box at the top then clicking the warning triangle button (as per the tip above, hover over the boxes and buttons to see the tooltips of what they all do if you are unsure) which causes all tracing information out of the integrations to also be logged.
Note that this only takes effect on newly started workers and MUST be switched off when you are finished as it causes extra information to always be sent from the server for all video connections until it is disabled.
The buttons at the top also provide additional information including:
- Server info: list the version of Device Server and the current CPU and RAM use of the server.
- Integration info: lists all the integration plugins installed on the server and their versions.
- Worker info: lists all the workers running on the server including their process ID, their current CPU and RAM use, and the command line they were started with (which tells you which integration plugin each one is running)

Test Device
Integrations have a number of reasons why they may not work (device not configured correctly, Sureview setup not configured correctly, device not accessible over the network or offline etc) including that the Sureview server may not be set up correctly. The test device simulated integration behavior and cuts all of those possibilities out.
If the test device...
- ...works: the Sureview server is set up correctly and can provide device control. So any real integration that isn't working is one of the other factors and not the Sureview server
- ...doesn't work: the Sureview server is not set up correctly and no other integration will work either until you solve that.
The test device provides the ability to simulate all integration features, including:
- Video: generates video on the server, including some 'preset configurations' to simulate how devices may operate:
- Input 1: generates encoded video
- Input 2: generates pass-through video
- Input 3: generates very high bitrate encoded video
- Input 4: generates very high bitrate pass-through video
- Input 5: generates very low bitrate encoded video
- Input 6: generates very low bitrate pass-through video
- Input 7: simulates an integration taking a while to start sending video
- Audio Receive: generating audio to be listened to, including some 'preset configurations' of:
- Input 1: generates "Mary Had A Little Lamb"
- Input 2: generates a sliding octave
- Audio Transmit: the audio you send will be saved to a .wav file on the server so you can listen to what was sent and check if it came through ok.
- All other features: show a message on the video any time an action is performed (so start video first, then push the other action buttons like PTZ, Outputs, or Sync.
By default, the Test Client page has all the manual boxes filled to use the test device, so when you first open the Test Client just enter an Sureview username and password and then click an action button such as starting video (no device Id) to use the test device.

Comments
0 comments
Please sign in to leave a comment.