Information
- Manufacturer: Exacq(+1 317 845 5710)
- Product:
- Exacq SDK
- Exacq HTTP
- Type: Video (Camera / NVR / DVR / VMS) / Alarm Receiver / Audio
Supported Features
Exacq SDK
- Event Receipt
- With attached video
- Video
- Live
- Recorded
- Playback (Back-In-Time)
- Pre-Alarm*
- Audio
- Transmit
- Receive
- Get Config
* When using pre-alarm recording, this integration will not automatically switch to a live view if the playback fails
Exacq HTTP
- Event Receipt
- With attached video
- Video
- Live
- Recorded
- Playback (Back-In-Time)
- Pre-Alarm
- Get Config
Components and Communication
| From | To | Port | Use |
| Sureview Server | Exacq | 22609 TCP | For connecting to Exacq using SDK |
| Sureview Server | Exacq | 80 TCP | For connecting to Exacq using HTTP |
| Exacq | Sureview Server | 25 TCP | For receiving SMTP alarms |
Sureview Configuration
Control Configuration
Standard Sureview Setup
| Host | The external IP address of the device provided by the installer |
| Port | The video port for the device |
| User | The username provided by the installer |
| Password | The password provided by the installer |
There are two Device types in Sureview for Exacq, Exacq SDK and Exacq HTTP. Please read the setup instructions carefully below as the setup differs between them.
Connecting to Exacq SDK
The Exacq SDK Default Port is 22609.
Enter the Device details in to Sureview, leaving the Camera ID field blank if there is only one Exacq server on site. Then press the Get Config Button. Sureview will query the device and return the information from it, including the Camera ID values.
If there is more than one server on site then ensure that the Camera ID field contains the server number of the Exacq system before clicking the "Get Config" button. 0 is the first server, 1 is the second server, 2 is the third, and so on. The format for this is s=x, for example s=0 or s=8.
The format of the Camera ID field can be seen below - it is a list of camera ID's separated by a comma. All ID's added here will be added as cameras to the currently configured device.
Connecting to Exacq HTTP
Finding CamID Values for Exacq HTTP
The Exacq HTTP default port is 80. This is the web port on the device. The CamID finder will also use this port to find the Camera IDs.
For Sureview to connect to the correct camera you need to specify the camera values (the S,P,D and I values) for each individual camera by completing the following steps:1. Open the Exacq CamID Finder ("%ProgramFiles%\Immix Cloud\Devices\ExacqIDfinder.exe" by default), enter the required details for the Exacq server and press 'Find IDs'.
Please note that the ServerID refers to the server number within the Exacq system. 0 means the first server, 1 is the second server, 2 is the third, and so on.
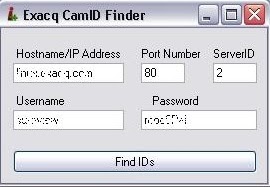
2. Find the camera that you are trying to add and copy the 'Combined Value'.
3. The value in step 2 needs to be entered into the Exacq device setup
4. Repeat these steps for each camera you want to add.
Audio Configuration
To enable the ability for site to transmit audio to the Central Station, when configuring the unit, you need to;

From Sureview, use the Exacq SDK Integration, fill in the details as normal, ensuring you use the Get Config option.
Note the audio device will be displayed in the audio section and the audio device ID will be populated in the 'Camera ID' field - this is expected.
Alarm Configuration
Configuring for Email alarms
1. Open the Exacq client and go to the 'Configuration' section.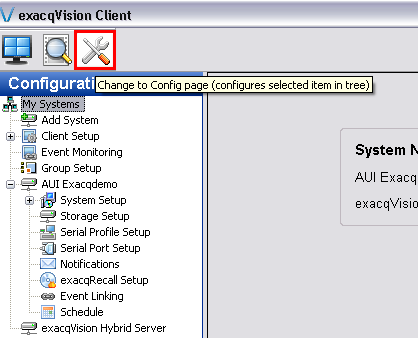
2. Select the 'Notifications' section of the DVR you are configuring
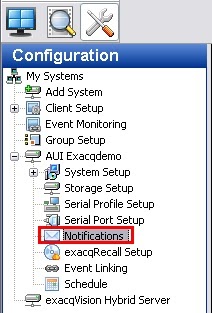
3. In the 'Address' field enter the IP address of the primary Sureview server, enter the SMTP port used (25 by default) and click 'Add' to save the configuration.
Note: The username and password should be left blank.
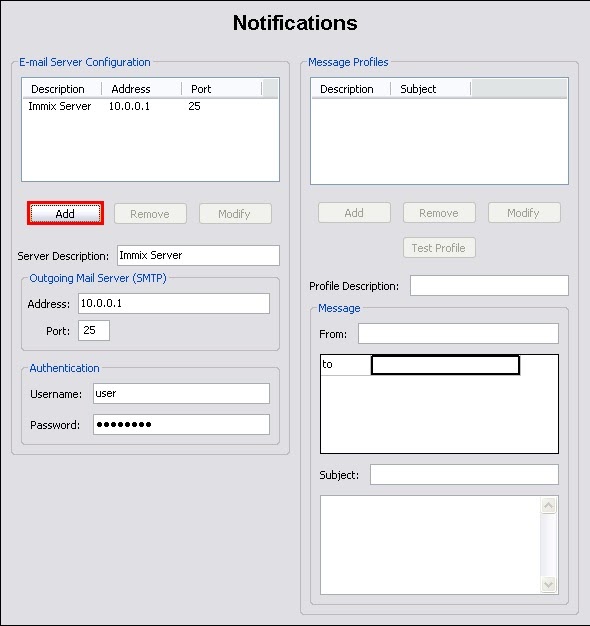
4. Add a 'Message Profile' for each Camera / Event Type combination for which you are expecting alarms i.e. if you are expecting Video Motion and Video Loss events from camera input 1 then add two profiles - "Camera 1 Video Motion" and "Camera 1 Video Loss". In the 'From' and 'To' fields enter the 'S' number email address given within the Sureview setup report, however you will need to change the email address to be in the following format: "Sx.Ay.Ez@Sureviewalarms.com" where; x is the Server ID given in the setup report for this DVR. y is the alarm input number (i.e. 1 for camera 1 etc). z is the event number according to the Exacq list.
These are the E numbers to use in the e-mail addresses:
- Video Motion
- Video Loss
- Input Trigger
- Serial Port
- Serial Profile
- Button Input
- Health
- IP Camera Connection
- Soft Trigger
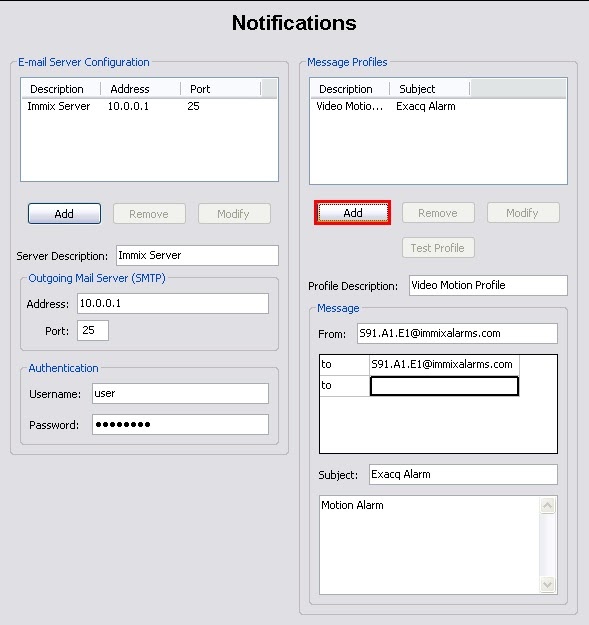
5. When you have added all required message profiles, select 'Event Linking'.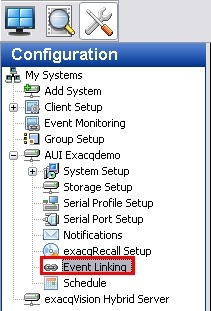
6. Click the 'New' button to create a new event.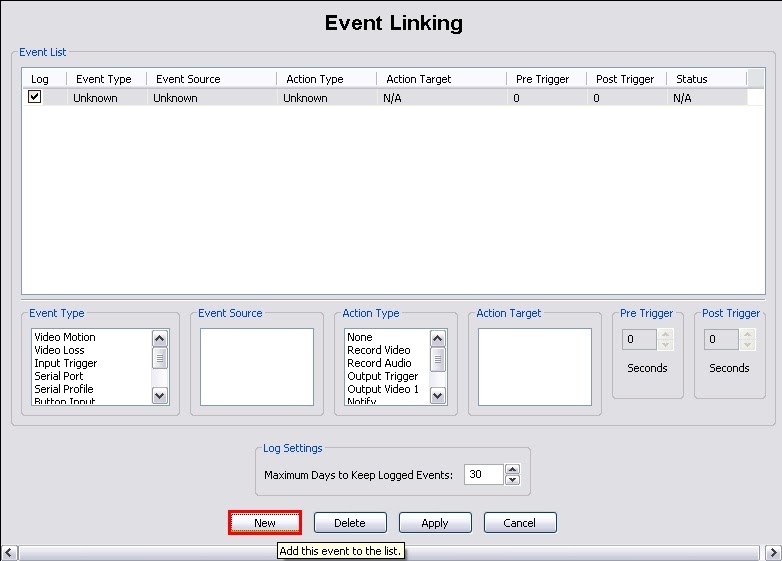
7. Add an event for each Camera / Event Type combination you require, set the 'Action Type' field to 'Notify' and then match each combination up to the profile you set up in the 'Notifications' section earlier. Click 'Apply' to save each event.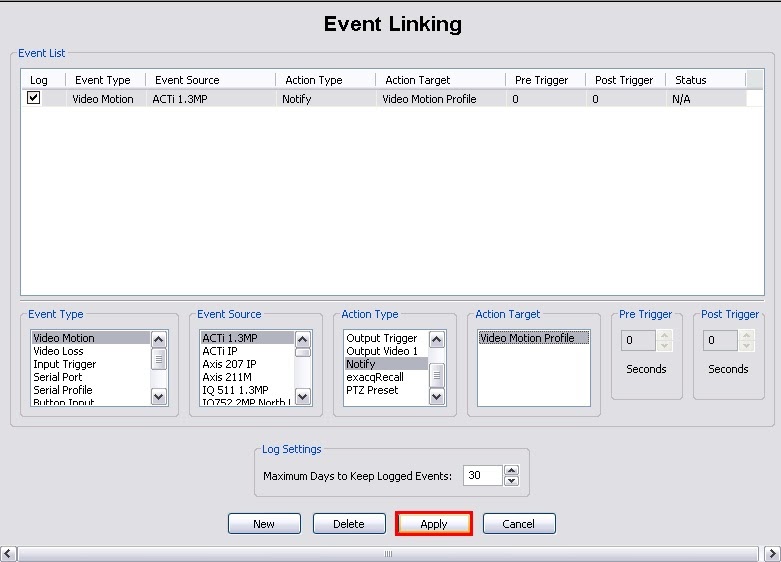
Troubleshooting
When using Exacq SDK: "Device error" or "Video Loss"
If the Exacq camera is working in the Client Software and Web Interface but not playing in Sureview then please check that DEP is switched off.
Exacq CamID finder: "Number of copies to create must be strictly postive"
Please confirm you are using the correct port number: Web Interface Default: 80 Exacq SDK Default: 22609Verifying the HTTP CamID values using the Exacq web page
- Use a browser to view the web page for your Exacq device i.e. http://myexacqdeviceip:portofwebpage/.
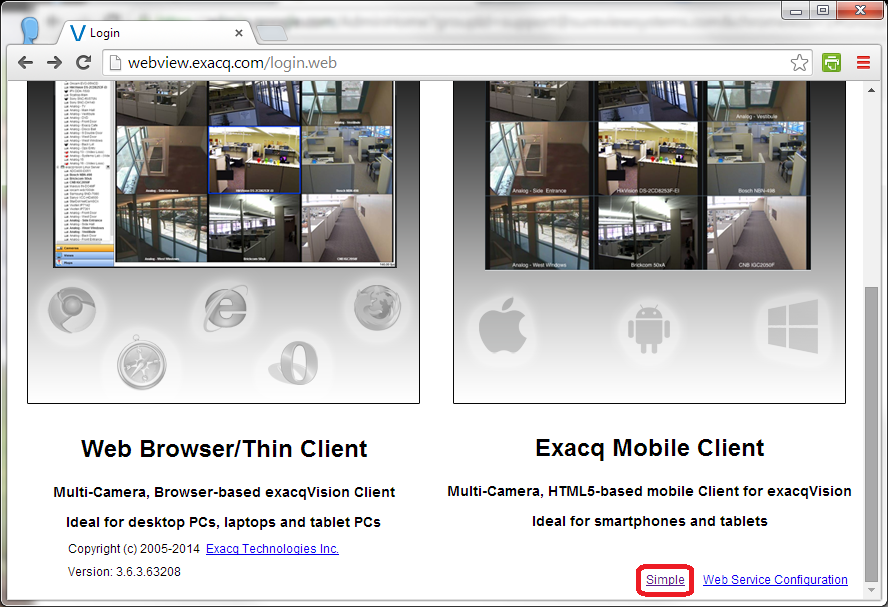
- Open the "Simple" interface.
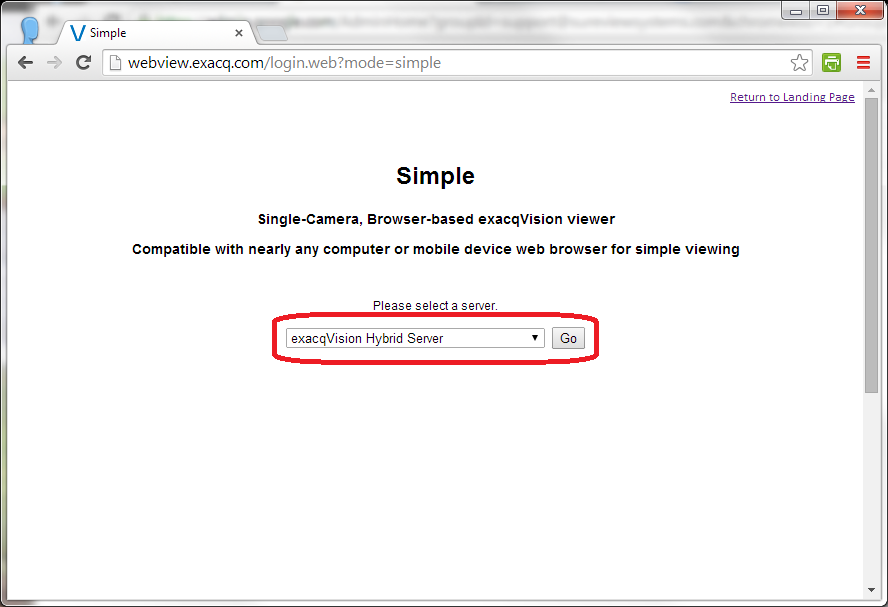
- Choose your Exacq server if you have more than one.
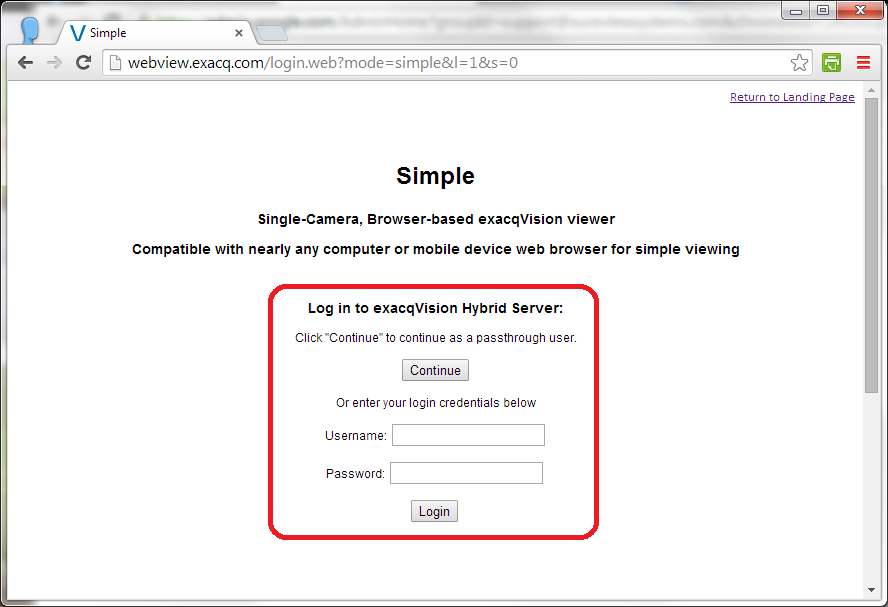
- Log in to your Exacq server using your login details.
- Choose a camera from list of available cameras.
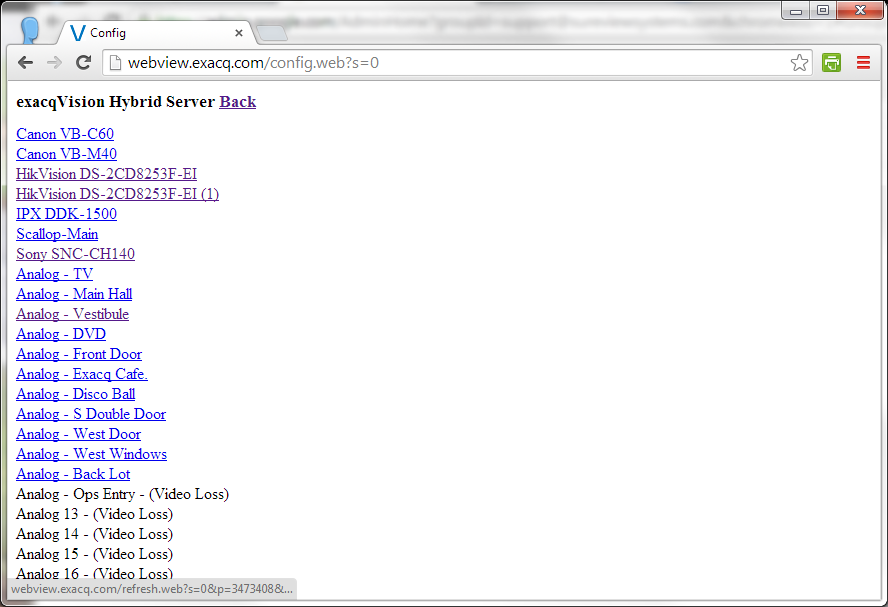
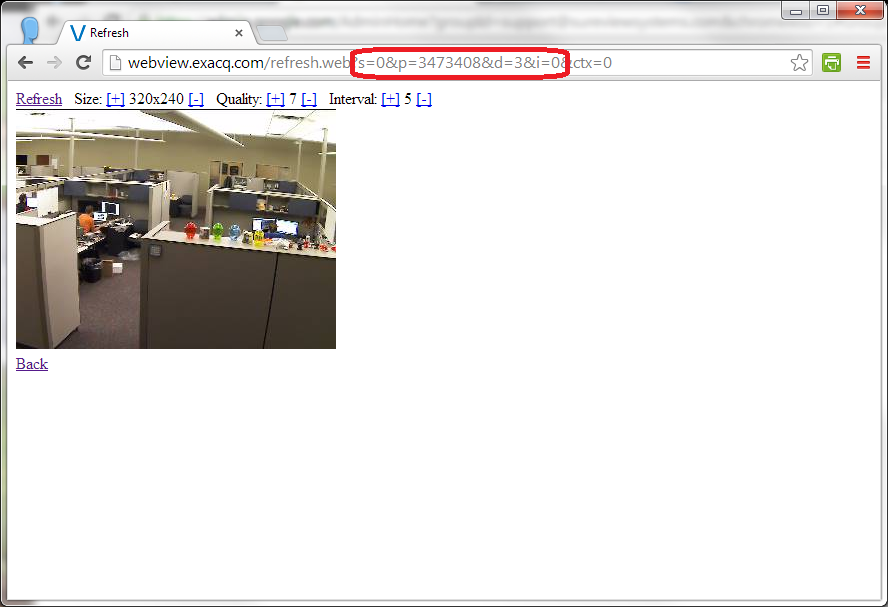
- A snapshot image of the camera will show, and the URL of the page shows you the s,p,d,i values for this camera to use with the HTTP integration.

Comments
0 comments
Please sign in to leave a comment.