Overview
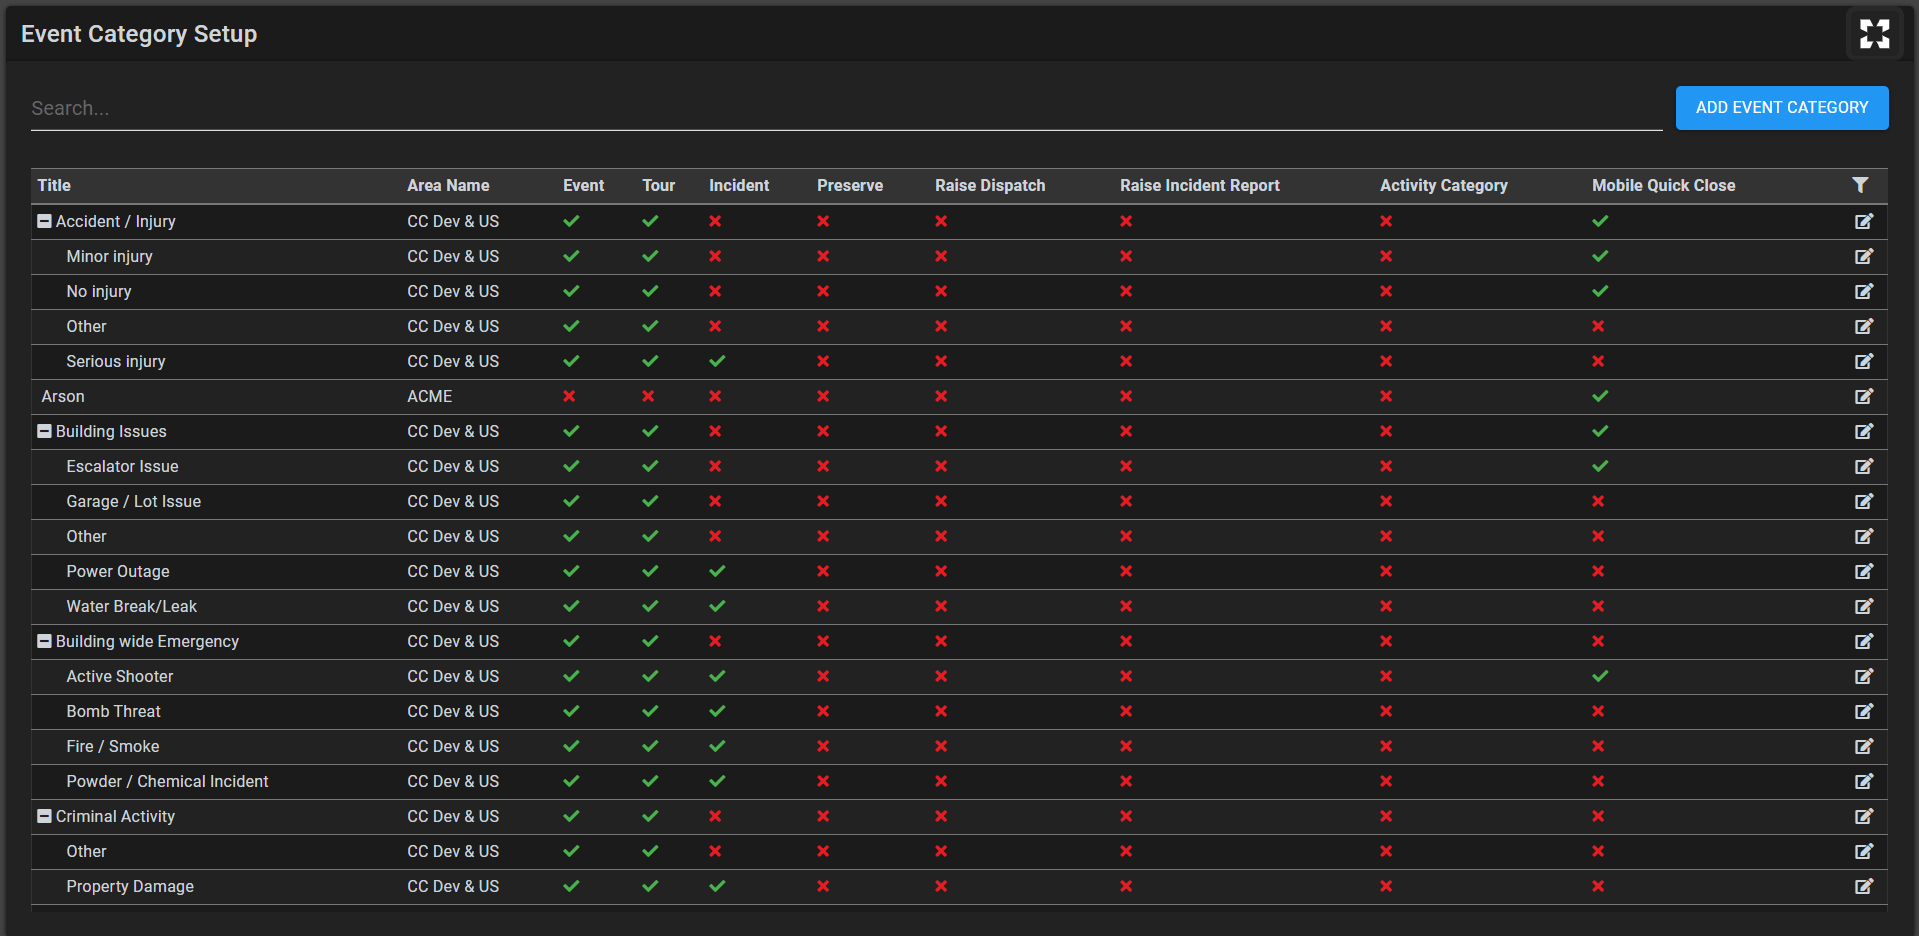
A setup interface where a user can create, edit and delete event categories. Event Catagories are the options operators have when closing an event or tour. Depending on the complexity of the user's system, the event categories can be organised as either a simple list or in a nested structure.
Feature Prerequisite
To use this feature, the "EventCategorySetup" feature must be enabled. Enabling this feature is controlled by your SureView Systems Administrator and may be dependent on your individual license. To enable the feature, go to your feature setup and locate the "EventCategorySetup" feature checkbox and enable it. In addition, the permission "Allows a user to access the event category setup interface" is required.
Accessing Event Category Setup
Once the feature and permissions are enabled, a user can access the interface. select the Setupr Category from the menu:
Interface
Below you can see the interface that loads on accessing the setup. Based on the user' preferences and complexity of their system, the event categories can be organised in a nested structure or simply as a list.

Adding an event category
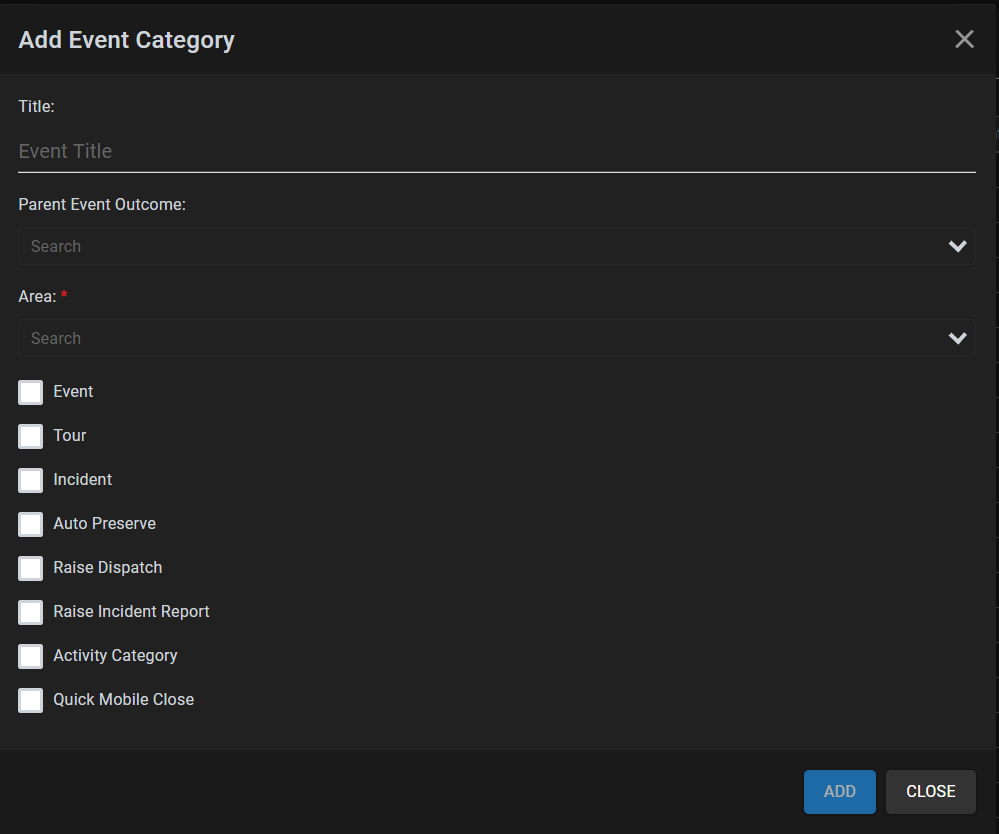
Clicking the "Add Event Category" button will present you with the screen below. The user can then specify the information for the category to be added.
Here a parent category can be specified to create a nested structure.
If a parent category is specified, the category to be added will then inherit the parent' area. In the case where the user does not want the category to inherit its parent' area, the area can be changed on updating the category after it has been added.
Title
The name of the Event Category that operators will choose when closing out Events.
Parent Event Outcome
Allows the creation of a nested event Category (note: Only the lowest level "child" category can be selected by operators)
Area
What Area this category should be available to be used with. This will automatically inherent down the tree so all sub-areas can access this category as well.
Normally you should select your Top Level Area - so all areas can use the category.

The tick boxes allow you to specify a number of options for the outcome.
- Event - This category can be used to close out Alarm Events.
- Tour - This outcome can be used to close out Tour Events
- Incident - Items closed with this option will automatically be marked as an incident for review. It's recommended that this is restricted to serious categories only.
- Auto Preserve - Items closed with this option will have their data marked for preservation and not deleted by your automatic housekeeping settings.
- Raise Dispatch - Items closed with this option will automatically raise a dispatch in a 3rd party system if available.
- Raise Incident Report - Items closed with this option will automatically raise and incident report and email it to a user marked as receiving incident reports.
- Activity Category - Items marked with this are available in the activity log to set the category for Notes entered.
- Quick Mobile Close - This outcome can be used by mobile users to closed event though the mobile app.
Updating an event category
To update an event category, locate the icon on the far right side of the row. This icon is shown below.
![]()
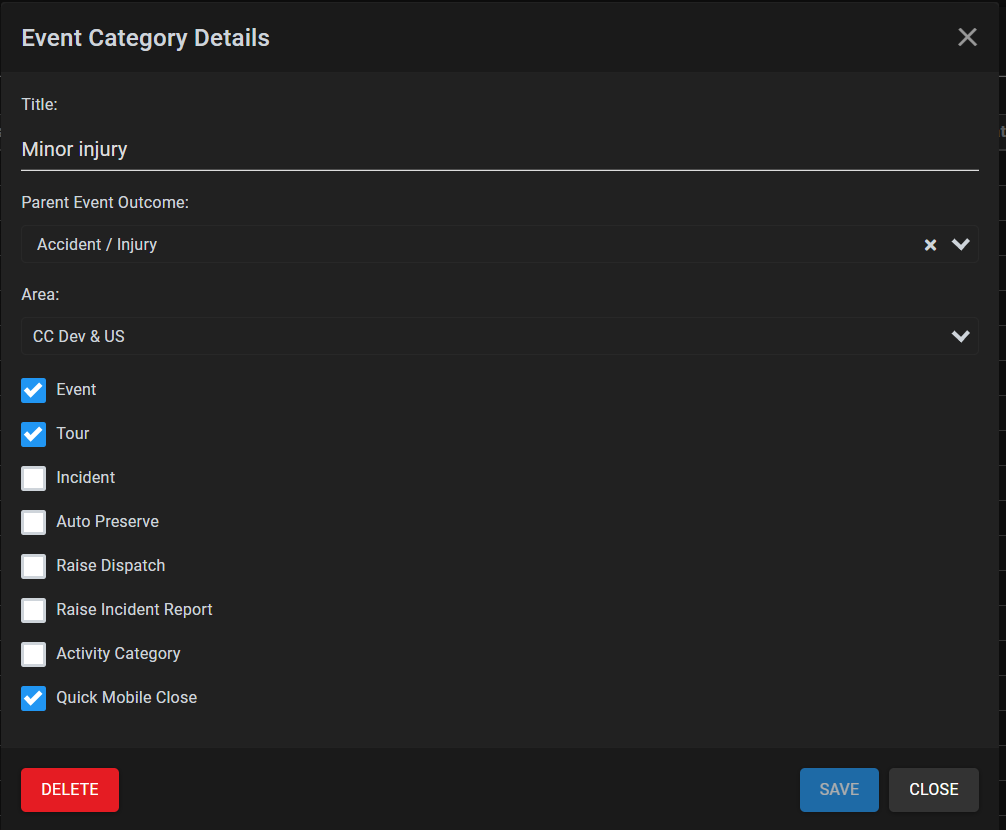
A box will appear with the event categories details which can be updated. Things to note when updating the category.
- When changing the categories parent, the category and its sub categories will inherit its new parent area.
- When the category to be updated does not change its parent but changes its area, all sub categories, if they exist, will inherit the category' updated area.
An example of the update box can be seen below.

Disabling an event category
If you no longer want operators to use a particular event category it's recommended that it is disabled rather than being deleted entirely.
Edit the category you want to disable and untick/disable all the available check boxes. Once all the items are disabled press the Save button
Once this is done, no operator or guard will be able to use the category for future events (while still retaining the category for historical purposes)
Deleting an event category
Important: Deleting a category will remove it from your entire event history. Any events associated with this category will change to "No Outcome Assigned".
To delete an event category, update the entry by clicking the icon on the far right side of the row for the category you want to delete. On updating the entry, locate the "DELETE" button on the bottom left hand side. Clicking the button will show a confirmation dialog to check if you want to delete the category. Click "YES" to delete. An example of the confirmation dialog can be seen below.

One thing to note when deleting, when you delete an event category, all sub categories, if they exist will also be deleted.
Comments
0 comments
Please sign in to leave a comment.