(Otherwise known as the "Site Monitor" window)
To begin processing an alarm, click on its name from within the Alarm Queue. This will take you to the alarm handling window, which will resemble the following:

A second window will also be opened, which can be brought to full screen on another monitor. This is known as the Media Matrix, and will be covered in the section labeled Media Matrix.
Alarm Map
The map on the response screen gives context to the location of the alarms and other nearby assets.
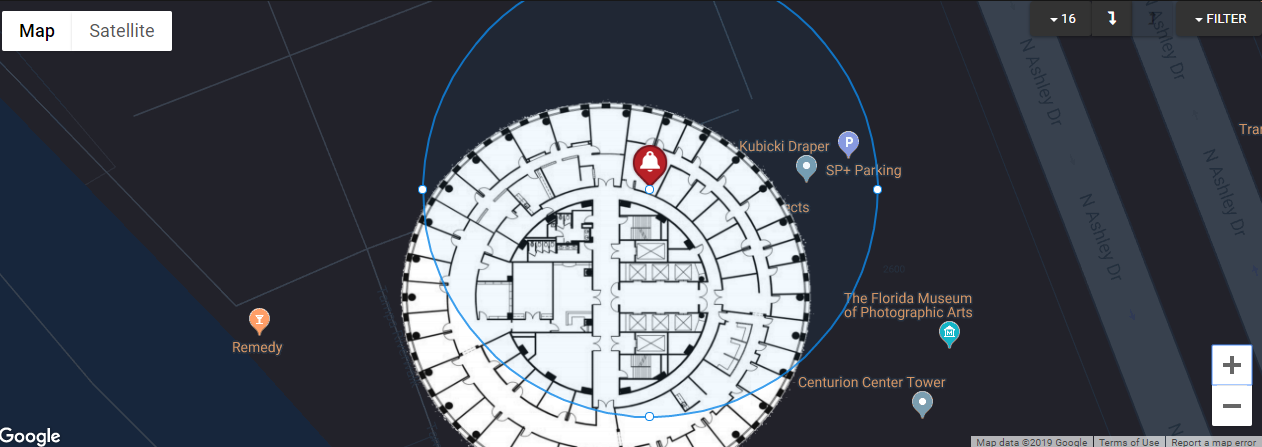
The map initially shows a radius of 30 meters, centered on the location of the first alarm in the event. If the event has no alarms, or if none of the alarms in the event have a location, it instead shows the center of the floor plans of the area; if the area has no floor plans, it instead uses the area address. If this is not set, then no map will be available.
Assets within this radius are shown on the media matrix, and have a different icon.
In the top left corner, you can control the map.

The number shows which floor you are currently on. Click it to select different floors. The arrows let you quickly go up or down a floor.
The  button lets you hide what different types of assets are shown on the map. Clicking it shows a full list of all asset types; you can click each type to show or hide it.
Actions
For most events, A predefined set of actions needs to be carried out to appropriately handle the situation. In Sureview, these actions are listed in the alarm handling window on the right side of the screen. Actions with a red background are required, and need to be executed before closing out the event. Those with a gray background are optional. Actions can be yes or no questions, requests for input, instructions to dispatch a guard, or just a general instruction.
The feature, Actions>CollapseCompletedActions will collapse a completed action plan once all actions within it have been completed to free up space on the actions bar. It can be expanded again by simply clicking on the action plan title.
Awareness Center
Within the alarm processing window, in the upper left portion of the screen, is an area that will look something like the following. This is where all information related to this event can be found. Note that the event ID is displayed to the right of the notes tab.

Event Details
Additional details about the event can be seen by clicking on the chevron to the far right of each alarm. This will reveal a window giving extra information as pictured below. This functionality is optional and can be enabled or disabled via the features setup under Alarms / Site Monitor / ExpandableEventDetails.

Filters
The first tab, labelled “All”, will show all information audited throughout the course of an event. Each subsequent tab is a filter that restricts the feed to information related to the tab’s name. The “Alarms” tab will show the alarms associated with this event, the “Operator” tab will show all operator activity logged to this event, and so on.
Notes
This is where you will enter any additional notes/attachments you feel are relevant that are not addressed by the actions. The “Add a note” prompt will be visible regardless of the tab you are on, but notes are only visible in the “All” and “Notes” tabs. These notes are logged for supervisors and other operators to see, and to help others stay informed on the event. Files can be uploaded to the notes platform provided the feature Alarms>SiteMonitor>NoteAttachments is enabled. Files can be in most standard image formats (.png, .mjpeg, .bmp etc.) or text formats (.doc, .txt, .log, .xlsx etc.)
Site Details
Within the alarm handling window, the name of the associated site is listed in the upper left of the screen. Clicking the name of the site will bring up a pop up showing the site’s address, any site notes, and all associated contacts. This includes local police and fire stations, as well as site staff contacts.
Area Notes
In the alarm processing window, if you have the feature "Area Notes" enabled, to the right of the site name in the upper left is the site notes button. This is where temporary notes related to the site will be stored. This can be information such as unexpected closures, building-wide events, temporary changes in office hours, and so on.
Clicking the site notes button will bring up the following menu. From here, you can see all existing site notes as well as create new ones. Notes can be set to expire after a predetermined time, or remain indefinitely if a time window is not provided.

If you have the sub feature AreaNotes>Icons enabled, sites that have area notes will have an icon next to them when in the alarm queue.

Command Corner

This refers to the upper right portion of the alarm handling window. It contains many of the tools you will use to respond to events, as well as communicate with supervisors and guards. The following sections will describe these features in greater detail.
Event Sharing
While within the alarm handling window, in the command corner, all operators currently handling this event will be listed in a thumbnail format. The operator’s name will be shown when you hover over the their thumbnail. Immediately to the right of this list is a small button with a plus sign on it, depicted above.
This button is used to bring other individuals into the event. If the person you wish to include is an operator, you can simply search for them by name in the menu that appears, depicted below. If you wish to invite a non-Sureview user to the event, you can provide their name and email and Sureview will send them temporary login information for them to view the event.

The Event Sharing button can be hidden by enabling the Alarms>EventQueue>DisableProcessingActiveAlarms feature and disabling the "CanProcessActiveAlarms" permission. Please note that this permission will also disable the "Processing Tab" in the Alarm Processing Queue only has an effect if the feature is enabled as shown in the diagram below.
Dispatching Guards
Dispatching guards to the scene of an event is a regular occurrence for operators at Rock. Keeping track of which/when guards have been dispatched to, arrived at, and left a scene is an important part of maintaining situational awareness. Within Sureview, this is done using the dispatch button in the command corner, which is shown above.
Upon clicking this button, a menu will appear with all available guards within the associated dispatch zone. This menu is depicted below:

After dispatching one of the guards, a different prompt will appear next to the guard’s name with two buttons. These will let you either mark the guards arrival time, or clear the dispatch request. Be sure to clear the dispatch before ending the event, to mark the guard as available again. These buttons will resemble the following:

You are required to mark dispatches using the method above. If you simply include the dispatch in the notes it will not be flagged in the audit trail as a dispatch event. This will cause the reporting statistics for dispatch frequency to no longer be accurate.
Flagging Events
If you wish to bring an event to the attention of your supervisor or other operators, it can be flagged using the small flag button, located in the command corner shown above. This makes it easier for others to find the event within Sureview's Event Search feature, which will be covered in another section.
Sitrep
Occasionally while processing an event, you will need to bring a non-operator up to speed on the ongoings of the event. The sitrep button (located in the command corner, shown above) is used to generate a PDF with information pertaining to the alarm being handled. Upon clicking the button, the following menu will appear:
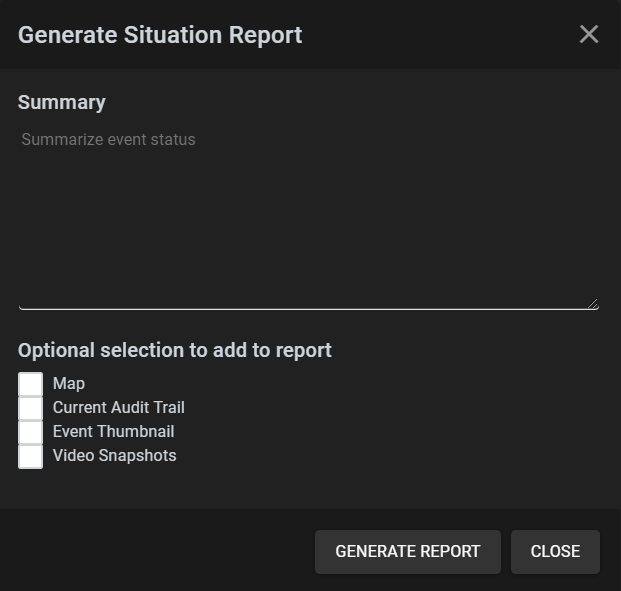
The following can be included in the PDF report:
* The “Map” option will show a Google Maps picture of the area.
* The “Current Audit Trail” option will include the entire audit history of the event.
* The “Event Thumbnail” option will include a marker on the map of the precise location of the event.
* The “Video Snapshots“ option will include any Media Matrix video snapshot images taken.
A brief summary may also be added to provide a more succinct description of the event.
Raising Events
Events can be raised to another routing group (If configured and the feature is enabled). Routing groups are currenlty configured in the V1 interface. Once in an event select the raise option and use the dropdown to select the routing groupi you want to raise the event to.

Leaving Events
Leaving an event is how you return to the alarm processing queue without ending the event currently being handled. This is done by clicking the “Leave” button in the command corner, shown above.
When you do so, you will be prompted for your reason, as well as how long you would like the alarm to be removed from the queue. The prompt is shown below. This should only be used when you are waiting for more information or an event is still ongoing.
Note that this will cause the event to move from the queue to the “Parked” tab, discussed here. You should not allow an event that is parked to go back to the alarm queue as this shows that the alarm is not being responded to. If you are still waiting on information simply park or leave the event again and set the time accordingly.

Ending Events
When all alarms have been acknowledged and all actions have been completed, the event can be closed out. This is done by clicking the “End” button on the right of the command corner. The following prompt will then be brought up:

Here you can select the type of outcome and provide a description of the event. Event outcomes are used in Sureview's reporting feature, and should be chosen with care
Map Search
This is a feature that provides the capability to search for an asset or address within the map in the alarm handling window. Enabling this feature is controlled by your Sureview Systems Administrator and may be dependent on your individual license. To use this feature, the "Alarms/Maps/CameraSearch" feature must be enabled. Once enabled, you will be able to see a search button in the alarm handling window' map as shown below. This is the button with the red arrow pointing towards it.

On clicking the search button, a search box will slide into view. You can then choose whether you want to search for an asset or an address using the buttons present. This search box can be seen below.
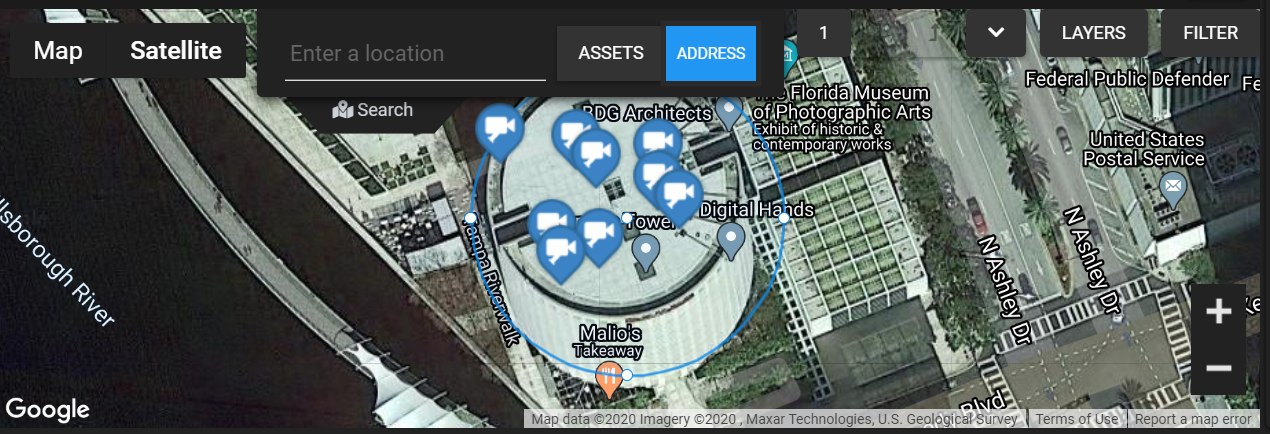
On searching for an asset, make sure to click the 'ASSETS' button first. On typing an asset name, a drop-down will appear with assets that match your search. An asset can then be selected and the map will then move to the location of that asset. An example of the drop-down can be seen below.
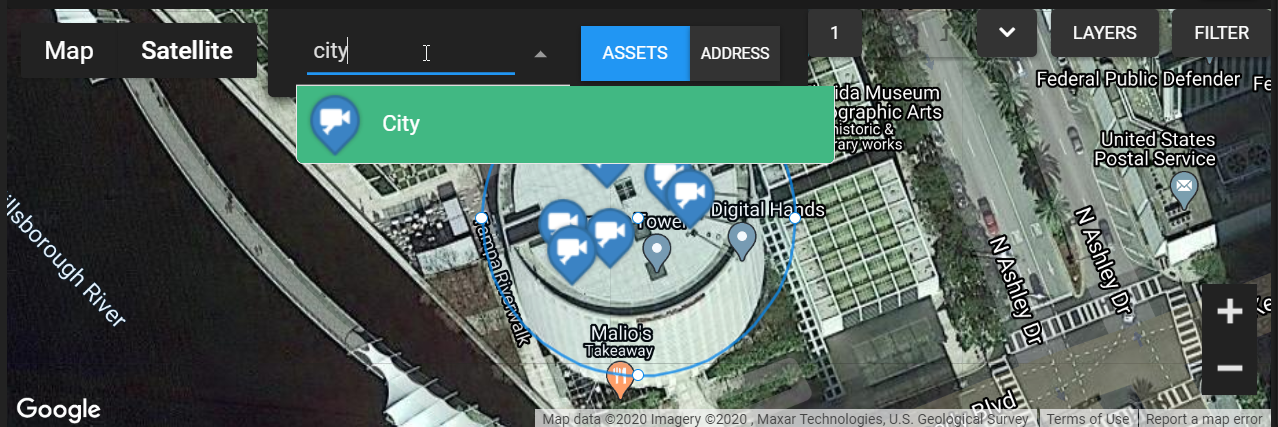
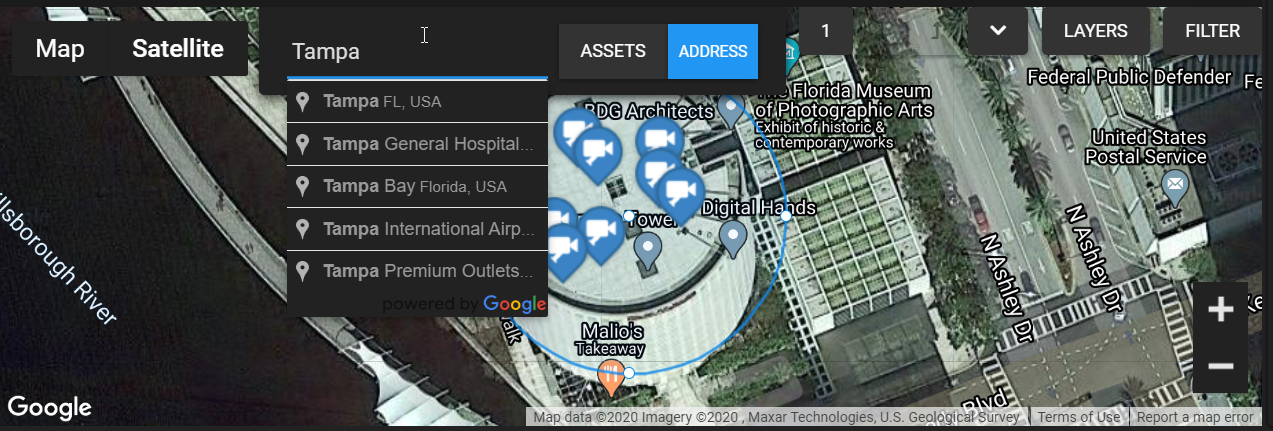
Similar behaviour occurs when searching for an address. Make sure to click the "ADDRESS" button before searching. An example of searching for an address can be seen below.
Comments
0 comments
Please sign in to leave a comment.